


by Mike Aanenson, on December 8, 2010
One piece of information that we often take for granted is the temperature. In Minnesota especially where winters are extremely cold while summers can be hot, the temperature is always a talking point, be it on the news or small talk with people you meet on the street. With the temperature on my mind (the temp is 13 degrees Fahrenheit and dropping as I type) I took an Arduino prototyping platform and decided to create a really simple web-enabled temperature device.
Now, if you have not heard of Arduino, it's one of these great little open-source products targeted at people who like to 'hack', 'make', 'prototype', or simply 'tinker' at home. The Arduino website is the best place to learn about what this platform is. They have a number of boards based on the Atmel ATmega line of microcontrollers and dozens of 'shield', boards that can be plugged on to the main board to provide further functionality, like Ethernet or motor control. On top of the hardware, the reason this is a great platform is that they offer a very intuitive and easy to install software IDE for creating applications (called sketches), all in C code. The libraries already available are vast and easy to install. As an electrical engineer who sees writing code as a means to an end, it's great to not have to spend time with compilers, re-writing simple routines, or trying to get a bootloader onto the board.
To make a new 'sketch' and download to the board here is the quick summary of steps:
- Install the Arduino IDE
- Create a new sketch, import any of the included libraries (SPI, Ethernet, Strings, math, etc) or add third-party libraries by downloading and adding to the Arduino folder on your PC. A sketch is simply a C code file and there are two functions: 'setup()' and 'loop()' The setup function runs once at 'on' or boot time and loop runs after setup, constantly doing a loop through the code (i.e. while(1) function).
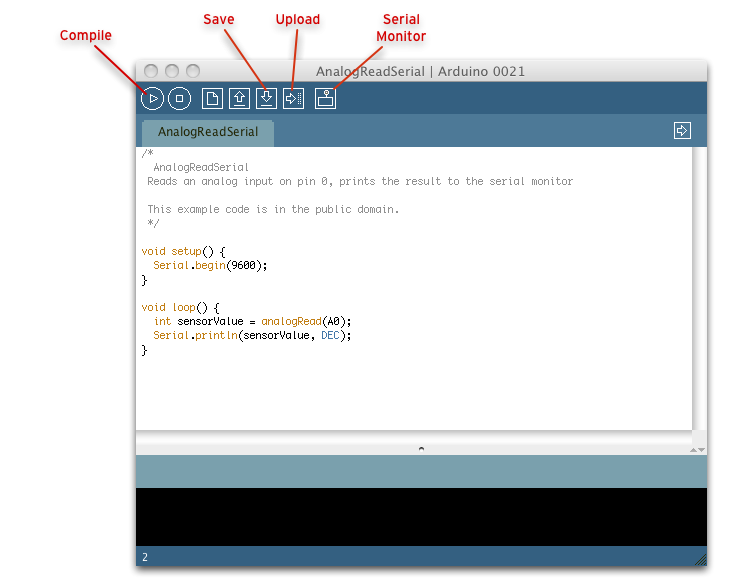
- Using three easy buttons... save, compile and download. (The IDE really has just a couple of buttons, keeping it simple)
- Use the included serial port monitor to watch for debug information.
You can do this in less than 15 minutes. The following pic shows a basic 'sketch' that sets-up the serial port and runs a loop that prints out an analog pin value over and over on the serial port.
Now that I've gone a little bit too much into the Arduino platform, let's focus on the temp monitor. I have the following hardware pieces, which I purchased from SparkFun, a nice little web store for buying prototyping electronics out of Boulder, Colorado. SparkFun has a great community of users, lots of posts about each product to find out how to hook-up a device or find public code.
- Arduino Uno
- Arduino Ethernet Shield
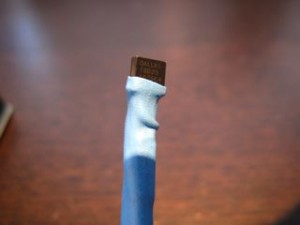
- Dallas Semiconductor DS18B20 One-Wire Temperature Sensor
- A 4.7k ohm resistor
- A little wire and heat-shrink tubing (optional).
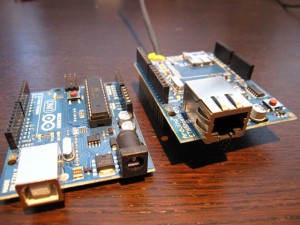
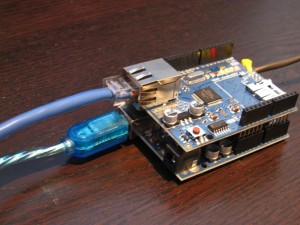
When putting these items together, we get something that looks like the following photo.
I chose the one-wire temp sensor because of two reasons. One is that it is much easier to read a value from a device that is already calibrated (at the factory) and I don't have to do any complex calculation like you would do with a thermister / resistor analog value. Hooking it up is just as easy and I describe that on the project page. The second reason is that there were already libraries available for the one-wire interface and specifically for this sensor.
(NOTE: July 2012 - The project page link has been updated with code for Arduino 1.0 and using the Exosite Arduino library)
The Ethernet library included with the latest Arduino install (v 21) supports the Ethernet shield and includes HTTP support. To send the data to my Exosite Portal, I use the Exosite's basic HTTP API. All of the hook-up information and source code for the Arduino sketch can be found on this project page.
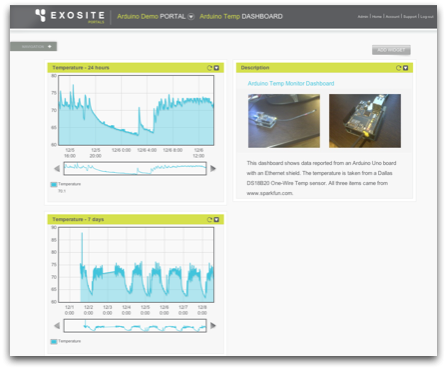
What I end up with is a dashboard that gives me daily and weekly temp trending and I have different event alerts set so if the temperature drops below or above thresholds I'll be notified. (Text Message: Your Pipes Are Going To Freeze!)
Now I get to think about all of the other uses for a web connected microcontroller with lots of I/O. This is a simple use case, but a great way to start building more complex devices to both send and read data from the Exosite Platform. As you can also tell, I'm a huge fan of Arduino. It's perfect for prototyping and for all of those ideas you think about outside of work (automatic window shades, amazing Christmas light display, door sensor, automated garden sprinkler, weather station, etc.)